I saw this amazing project on one of our DT’s blogs & I HAD to let you see it. Linda Hill is one seriously talented lady & she was created a work of art with this project using the new Popcorn Pals range. If you like what you see then make sure that you visit her blog to see what other gorgeous creations she has produced. Ok, without further ado, here’s the project…

To create the milk carton:
You will need:
7 pieces of A4 cardstock
Step 1
You will need 4 A4 sheets of cardstocks for the cartons…
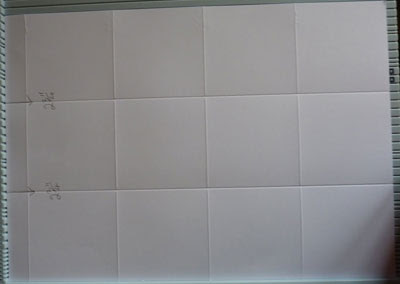
Score at 2 ¾”, 5 ½”, 8 ¼” and 11″

Step 2
With the cardstock turned as in the picture, score at 2 ¾”, turn the cardstock and score again at the 2 ¾” mark.
Step 3
Cut away the two small wedges as per picture and cut all the wedges to the centre score lines.
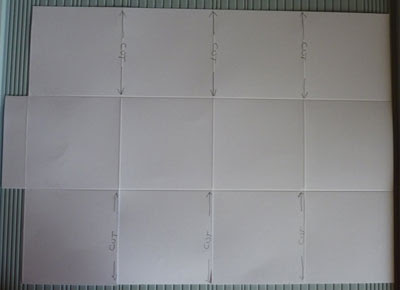
Step 4
Fold and score all the score lines and trim the top edges on the first and third wedge. This will be the top of you cartons.
It was at this point I decorated it as it was flat it was less fiddly. I then assembled the cartons once they were all finished.
Punch two holes in the rounded wedges ready for ribbon. The other two flaps you just fold in.

Step 5
To create the holder base cut a piece of cardstock to 8×8” then score around all sides at 1”. Assemble as you would any box.
Step 6
To create the handle you will need 2 pieces of A4 cardstock. Cut these together so that you would have them both the same size. I used a nestie die cut for the opening but a punch would do if your cardstock isn’t very thick (I ran this through a couple of times).
Glue them both together up to the score line, leaving below the score lines open. Open out the flaps then glue both into the centre of the holder base.


